
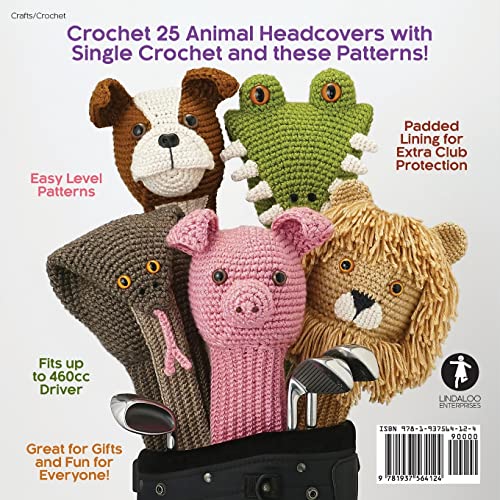
Amigurumi Golf Club Covers: 25 Crochet Patterns for Animal Golf Club Covers
D**H
Ok if you already know how to do amigurumi
Growing up making crocheted blankets, I only have just discovered amigurumi. I consider myself somewhere between novice and expert. I’ve made about a dozen amigurumi figures, all of them up until now, were stuffed animals. But when I saw Linda Wright’s book for Golf Club Covers, with a son on the high school golf team, I knew I would be making many. Although any amigurumi patterns could easily be modified to make golf clubs covers, I considered this book a good investment because I wanted the pattern for the foam insert and the ribbed neck.My first pattern was the Labrador retriever. However, I modified the ears from the Bulldog pattern to match the look of my own dog. I was able to complete the dog pattern in less than two days, but not without some frustration.Pros:• 25 choices of crazy cute animals to pick from• Majority of the animals use same pattern for head cover• Using two stands of yarn together, makes the head cover feel very sturdy, which is needed for golf club covers, and using two different colors could add a unique look• Using back-loops only, makes for a beautiful ribbingCons:• Poor assembly directions; particularly how to sew the head cover to the ribbing• Poor lining instructions; particularly on how/when to sew lining to head cover• Photos are only of final product, no “in process” photos.• Barely fits a driver; works, but is tight (see photo with ruler)• Poor advice to use invisible thread; no way that would last long term with the animal head being pulled on and off the club head.It is important to measure your gauge (p. 18) because you will need the foam insert to fit properly. I ended up using a hook, two sizes down from size recommended in the pattern in order to meet the gauge requirements.The weakest element of this book is in the directions of assembling the pieces. If you’ve never done amigurumi before, you’ll need to go to YouTube or bloggers who show lots of photos, to get details on how to sew ears, snouts and other accessories to the head; you won’t find what you need in this book. And I also suggest adding eyes and doing all the sewing before putting in the foam and before attaching the ribbing, not after, which is what the book directions suggest.I’d never worked with Pellon Flex Foam before, but it was easy to cut, and easy to machine sew. I do wish photographs had been included in the book to help with the details. I wasted a lot of time having to figure it out on my own. I hope my photos help those of you following in my footsteps. There is only one page of “Lining” instructions (plus a template page) and it is referred back to for each pattern. The cover head lining is what makes this book unique as an amigurumi book, and it deserved to have included more detail; 3-4 pages, with photos, not hand-drawn sketches. I took photos of the foam lining at various stages, I hope this helps you.While my final head cover matched the final measurements the book said I should have, the foam insert ended up being a bit too big. I used the suggested seam allowance, but the foam still had some buckling (see photo). I didn’t worry about it since it didn’t impact the look of the animal head. Although the book suggests using invisible thread for sewing the pieces together, it is a pain to work with, and I’m sure the thread would not be able to hold up. I sewed on the ears with invisible thread before going back to the old stand-by of using matching yarn.Once I had the eyes, snout, and ears attached with yarn, I placed the foam insert into the head with wrong side, seams visible. That way the smooth part is touching the inside of the head, keeping it smooth. I tacked the foam to the crocheted head with a needle and thread, at the top of the head, sewing in a circle around round 2. I also did a running stitch to hold the foam along the circumference of the neck, before moving on to attaching the head cover to the ribbing.For the life of me, I couldn’t figure out how “right sides together” could possibly work for assembling the head cover and ribbing. So I ignored that in the directions. The ribbing has a smaller diameter than the head opening. To aide in assembly, I put the head on a large tin can (approximately 3 ½”; see photo) and then stretched the ribbing to meet the head opening. This made working in my lap much easier. I know how hard this seam will be yanked, and so I used red yarn to match the dog’s color to make it an extra firm seam. The yarn has some give and flexibility (unlike thread) and I am confident that the three times around, will hold for the long-term. I’ve included a photo of the stitch that worked best for me.I am pleased with the final product. I plan to make the flamingo next. The turtle pattern could easily be modified to be a big-brimmed sun hat (maybe with flowers) and would look really cute as a golf club cover. I also plan to make figures not included in the book, but using the skills I’ve learned. I think I may make a yellow/blue minion or a unicorn from other patterns I already have.Enjoy!
K**D
Very cute, fairly easy!
The golf club covers in the book have easy to follow directions, with lots of prep instructions (suggested materials, where to find said materials, etc.). Just FYI, extra bulky or bulky yarn can be used if you get gauge with it, instead I’d holding two strands of acrylic yarn. I will update with photos when I am finished with a couple of them.
D**A
Cute animals
While the animals are all cute the directions could be more explicate such as what row to put facial features.
N**R
Don't be intimidated by the cuteness!
This is a great book. I'm only a mediocre crocheter, but this made it so easy to make these cute head covers if you follow her instructions to the letter. I've already made six adorable covers. My friends are all asking for them.
S**E
Fun Golf Club Headcovers
Very well-written instructions. I've made 3 of them so far but my favorite is the flamingo.
D**S
Lots of patterns
Lots of different patterns! Was pleasantly surprised
C**L
Easy to make
Directions are clear and easy to understand. The finished product fit the clubs perfectly.
T**Y
It is ok, not the best
It does descript how to but not detailed enough to follow. Step by step is need it for each
D**E
Lovely gifts to make for gokfers
Made 2 of them and they were great for gifts
P**Y
Nice patterns
Easy to read
F**A
Muy buena compra
Muy bueno, muy bien explicado y tiene muchos modelos
P**P
Good instructions
Starting the racoon SOON - may turn the golfers into zoo keepers 😁
C**N
Easy to follow instructions
Love it. I’m not done with my 1st cover. So No photo yet. Patterns are easy to follow.
Trustpilot
4 days ago
1 month ago
